Pages

Wednesday, December 24, 2014

Peace


May we all find many ways to be kind to each other in the coming year!

Friday, December 12, 2014

Many Thanks to the Squirrels

Years ago we decided it would be fun to use the black walnuts falling from a local tree. After hours of work and very few nutmeats to show for our labor, I understood why black walnuts aren't a staple of our diet. And I can still remember the stain on my hands that took over a week to wear off--nothing would wash it off.

So I knew black walnut would be a good candidate for natural dyeing even before I kept seeing it mentioned as I did my research. But for two reasons I kept putting off adding it to my list of items to experiment with:  I did not relish ripping that outer husk apart and I did not know of any nearby black walnut trees. And then one day as I passed by a back window, I saw a squirrel sitting on the corner of our neighbor's deck railing and what was he chewing on? His sharp little teeth were quickly turning that tough husk of a black walnut into a pile of pieces just right for throwing in a dye pot. Over the next couple of weeks I found a number of such piles on our own deck and patio and even got our neighbors to give me the piles from their deck.  They graciously told me I could gather nuts from the tree (which was in their yard) but I decided I would make do with the preprocessed  husk chips I was collecting.

Finally I had enough:

At first I was a bit disappointed in the cotton, which you can see below, but it has very interesting gray brown veins, which don't show up well in the photo, and it would make a great neutral background for something.

The silk, as usual, won the beauty prize with its rich brown mottling.


And just so you can see that I am not just creating more fabric, but actually stitching some together, I will add a snapshot of one of the new projects I am beginning


And if you are still with me, thanks for the company!


Saturday, November 22, 2014

Spinning Gold

As I continued to experiment with my scrunchy, texturing technique, I had to try adding silk so I dyed several gradations of yellow and set to work. I love the shimmer it adds to the texture:

Spun Gold 14" x 16"

The silk shimmied around as much as it shimmered when I was trying to get a needle through it, but it felt so good in the hand and created such dynamic textures that I easily forgave it for having a mind of its own.


Friday, October 17, 2014

Using natural chemicals

Even though I believe that the most dangerous part of the chemical dyes is the possibility of inhaling them, I have still been intrigued by natural dyes as being bit more friendly to things that matter to us. I even went so far as to buy India Flint's book on the subject a couple of years ago. But I finally seized the opportunity to try it out about a month ago. Beginning with goldenrod seemed ironically appropriate particularly since we had just moved from a farm with a whole field of goldenrod to a city where goldenrod does grow here and there but is usually on someone else's property. I was whining to my friend Cecilia about this when an hour later she arrived on my doorstep with an armload of goldenrod fresh picked from a New Hampshire roadside and soon it was in a pot ready to be boiled.


I covered it with water, let it boil for a couple of hours, and then drained the liquid. I threw a small piece of silk into the dye since I had read that silk will take the dye even without a mordant. But, as usual, not everything you read is accurate; it did color up a bit, but was not anything I even commented to the dog about.
Then I stirred in 2 T alum as a mordant, threw in a piece of silk and a larger piece of cotton and boiled them for about 15 minutes. I let them soak overnight in the dye and then hung them to dry but waited for a week to rinse and iron them. But I got excited even before they were completely dry. Here's the cotton:

And here's the silk!!

I had also read that I could get gradations by boiling the original goldenrod again in fresh water and repeating the process--and this was true. The silk soaked up so much dye that you can't tell the difference in the photo but in the cotton there is a clear difference between the second boiling on the right and the first on the left. 

My next experiment involved avocado pits, thanks to the help of my daughter Clare, whose family has a fondness for guacamole. A couple of them were beginning to move into the pre-rot stage (I kept forgetting to pop them in the freezer) so I threw what I had into a pot:

Now I had also read that the longer you boil these guys the redder the dye gets and so they were on the stove for 3 or 4 hours. It was a busy day and I wasn't checking often enough, and much of the water had boiled away by the time there was a significant color in the pot. Not wanting to dilute anything any more, I stirred  in 2 T alum, brought it to a boil, and then threw in a piece of cotton and a piece of silk. I left the pits in with them and boiled it all gently for about 15 minutes and then left the pot tilted over night so that the fabric was mostly covered by the small amount of liquid left.

And here, after hanging them out to dry and then waiting a week to rinse them are the results:


You have probably guessed that the silk is the second photo--a very rich reddish tan. Perhaps more pits--or more liquid--would produce a stronger dye. A smaller pot would help as well, which I am working on, since I am reluctant to use the pots I cook dinner in. Even though all this stuff is growing somewhere, they are, as my chemist sister would remind me, still concentrated chemicals.

And, if you are still reading, thanks for the company!


Friday, September 19, 2014

Doodling

Wanting to extend my repertoire of hand stitching beyond the basic running stitch that I love so much and needing some small projects that I could use as a break from a larger  (I did not say interminable, but I thought it) project, I decided to challenge myself and commit to a stitching journal. I would choose a stitch, prepare a sandwiched "page," and then for two weeks I would play with that stitch working on structured and free form versions to see what kinds of patterns or texture I could produce with it. I thought two weeks would give me plenty of time, given the unpredictability of my schedule these days.

I chose the blanket stitch and dutifully produced a row of blanket stitches on the first day. That was a month and a half ago so I didn't exactly abide by the rules (I have plenty of good excuses I can roll out ranging from major house projects to some great adventures with grandchildren), but this week I declared myself done with this stitch, at least for now, and ready to move on. 


When I was learning machine quilting and made a commitment of fifteen minutes a day practicing, I ended up with a number of doodle squares that I could sell. I am not sure I will ever produce anything finished enough to put a price tag on with this project but you never know.

Next stitch will be the backstitch. I may have to work at coming up with creative forms for this one. Let's see what happens in two weeks!


Friday, September 12, 2014

Celebrating Labor Day

I got to celebrate the fruits of my year long (or more) labor in a very appropriate way this year. During the long process of our move to MA I had joined the Abstract Artists Group of New England. They are a somewhat eclectic group in terms of media but I was the only textile artist among those who worked with acrylic, oil, watercolor, collage, pastel, and several other media. Each year they have a show of members' work at the Newburyport Art Association and this would be my first show with them.

I ended up with ten pieces in the show and, when I looked around on the evening of the hanging, I knew I had joined the right group.


There were seventeen artists participating in the exhibit so these pictures are only a portion of it, but you can see how my work fit in. The show opened August 22 with the opening reception on Aug. 30, Labor Day weekend, and the day of the big Riverfest in Newburyport. At times it looked like wall-to-wall people in the gallery and it was exciting to see that many people looking at and talking about the work in the show.

I am enjoying getting to know these artists and seeing their work in the show and at our monthly meetings.  And it is energizing to receive comments on my work from artists working in such diverse media.

And if you are still with me, thanks for the company!

Saturday, September 6, 2014

Blog Hop

It has been a long summer with lots of settling in, house repairs, and getting to know new people and a whole new area. My blog has suffered. I am celebrating the approach of fall with a renewed resolution to blog more consistently and I began by accepting an invitation to a Blog Hop from a new friend and fellow member of the Abstract Artists Group of New England, Ethel Hills. This hop requires that I answer four questions today and then nominate three more artists who will continue the process next Saturday by answering the questions on their blogs and nominating another three artists. And so the questions. . . .

1. What am I working on/writing?
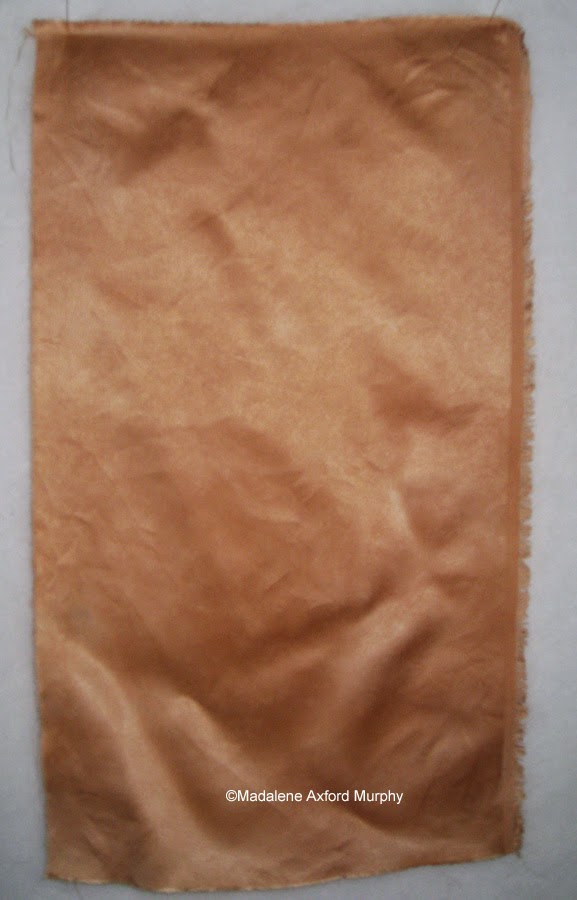
Currently I am spending much of my time on two series. I have always been intrigued by texture in art and when I began to dye my own fabrics I increasingly chose techniques that produce texture by manipulating the color values of the dyes or by printing on the dyed fabric. And then I added a tactile element—texture produced by a combination of scrunching and hand stitching, and I have been spending some time seeing where this technique leads me.

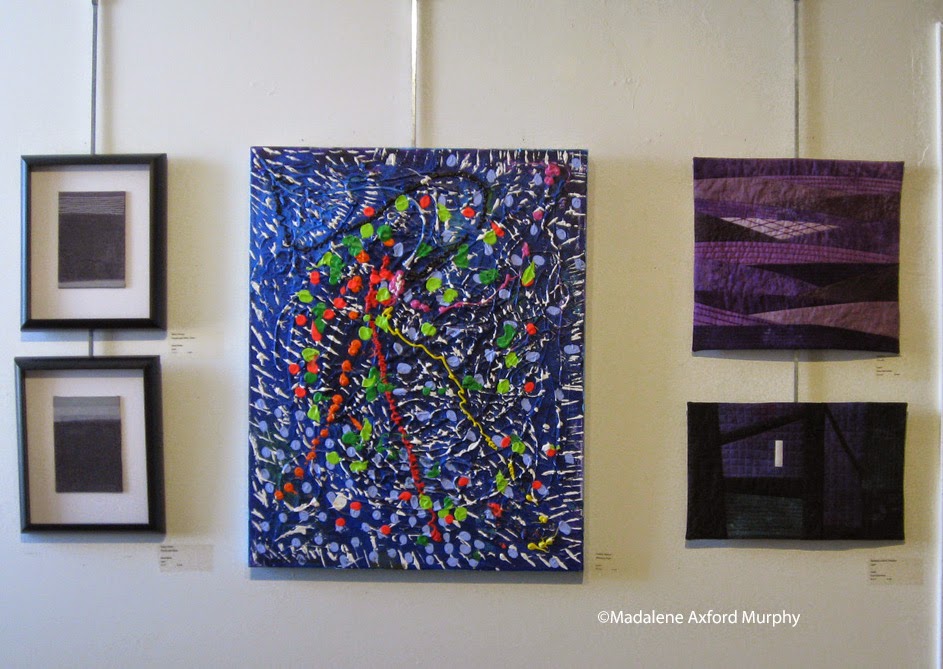
I am also experimenting with raw-edge applique sewn to the background with visible stitches using a heavy thread like perle cotton.  Although the edges may fray, I like the way the fabric lies flat against the background without the stiffness caused by a turned-under edge or a layer of fusing.

2. How does my work/writing differ from others in this genre?
As I was writing the answer to the first question I realized that my two series were breaking with quilting tradition that emphasizes avoiding wrinkles and frayed edges when joining fabric. I am actively embracing both at the moment because I want to let the fabric be fabric and see what happens. I find myself drawn to the wabi-sabi point of view—one that delights in the beauty of the imperfect, the simple, the natural, the ordinary.  I am definitely not alone in this preference but it does seem to set me apart from a great number of textile artists.  And my work probably differs from others, no matter what technique or series I am pursuing, because I am combining my own hand-dyed and/or printed fabric with my unique and ever-changing vision of the world.

3. Why do I do what I do?
I grew up wandering the back hills of Kentucky and the bluffs overlooking the Mississippi River in Iowa, spent a good chunk of my adulthood in the northcentral mountains of Pennsylvania and now find myself in a city in New England with a five-acre pond outside my studio window and the ocean ten minutes away. And the colors, textures, shapes, and movement of the trees, water, animals, and skies that I have known in all these areas influence my work and its recurring themes of interconnectedness and change.

A number of years ago I came across a quotation from Harold Thurman Whitman:  ”Do not ask yourself what the world needs. Ask yourself what makes you come alive and go and do that because the world needs people who have come alive.” When I make art, I come alive.

4. How does my writing/working process work?
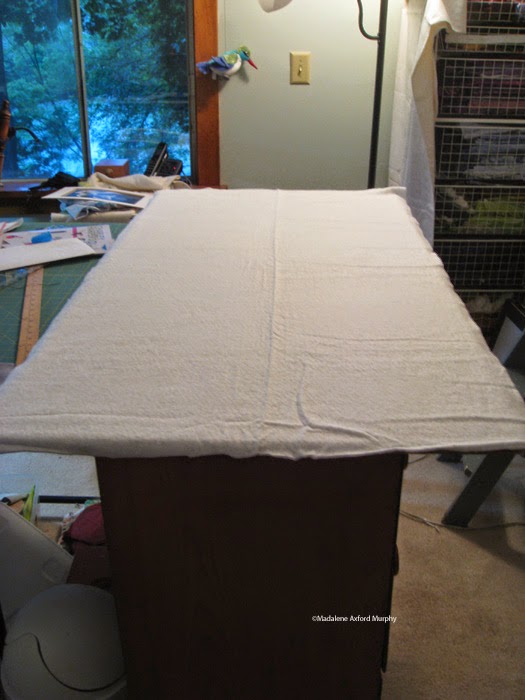
I sometimes begin by putting an intriguing piece of fabric on a corner of my design wall and leaving it there for a week or a month or more until I come up with a vision of what to do with it.  At that point I may do a rough sketch or I may begin to build a composition with bits of trial fabric that will ultimately be replaced with more carefully cut shapes.

But I also sometimes begin with a sketch that may be totally abstract but more often is inspired by a natural shape or pattern, a plant or an animal, or by a word (not a surprise, given my English literature background) that I keep in my head as I work. The sketch becomes a guide rather than a template as I make minor and major adjustments as the piece takes shape.


Sometimes I will dye fabric for a specific project but more often I will choose already dyed fabrics, auditioning various hues and shades, always aware that the thread I use will add more color, texture, and even line.


Thank you, Ethel, for inviting me to participate in this project and for giving my an excuse to think about what I am doing and why I am doing it and for giving me a way to learn more about some very talented artists. You may read her post here.

Ethel HillsI’m an abstract landscape painter living and working in Hampton, NH. My studio is in an old factory building a couple of miles from the ocean. I came to art late in life, learning to draw so that I could make the simple line drawings necessary for traditional rug hooking. In that moment when I decided to learn how to draw, my life shifted. I fell in love with drawing and then painting and haven’t looked back since.

And now let me introduce you to two people worth knowing. I will announce the third artist later.
Frauke Schramm
Frauke Schramm has been my friend for a number of years and I am still amazed at what she can create with needle and thread. Her work has been in exhibits all over Europe.
I’m Frauke Schramm (also known as quilthexle). I live close to Stuttgart, Germany. By day, I work as a teamleader (customer services) in a book-distributing company. By night, I’m a textile artist (and sometimes, I try to get some sleep !). 
When I was a kid, I used to collect the scraps of my mother's sewing projects (she sewed most of our clothes herself). I did not know why I did this - but I loved cuddling them. During my studies I was an avid knitter, but that came to an end while I wrote my Masters Thesis. After I finished my education (I'm a trained bookseller and I hold an M.A. in Political and Educational Sciences), I joined  corporate world. And I realized - I need something to balance all this brainwork. So, I took a patchwork class - a LoneStar class, to be precise ;-)) That quilt ended in the bin, but my husband rescued it (it's still in my house). Anyway, I was hooked. For quite a while, I was happy just to play with fabrics and learning traditional techniques. Artsy elements slowly turned up in my quilts. Around 2009 art quilting took over, at least mostly. I enjoy working with my own hand-dyed fabrics as well as with purchased fabric; recently, I stepped away from the "cotton only" rule, and the variety of all the material now available to me really excites me.
My central theme right now are opposites / contrasts - I love exploring them, and I have only scratched the surface so far !
              Frauke Schramm's blog:  http://www.quilthexle.blogspot.com/


Janis Doucette

Janis Doucette is a friend and fellow member of We Are Six, a group of art quilters living near Boston. She loves to play with surface design and I love to see what she comes up with. She currently has a piece in the Whistler Gallery in Lowell, MA.

I’m lucky – at this point in my life, I get to work on whatever my heart desires! Most often, that means I'm working on some form of textile art. Often, I’m printmaking or taking photographs, which are frequently incorporated into fabric, literally or figuratively.  I may also add paint to, or dye my own fabric. I may add beads or various odd tidbits to a piece. Today, we have an alluring array of commercial fabrics available and I also use them without restraint.

Every day is an ongoing experiment in life where I continue to observe, learn and grow.


                      Janis Doucette's blog:   http://turtlemoonimpressions.wordpress.com/


Look for their posts next Saturday!

Wednesday, July 16, 2014

Darkness Visible

Adding a bit of black to a quilt can give it dimension, depth, mystery-- the list is long and I always look for a really true black when I go shopping since that is hard to dye. But I would love to try this new black in a quilt:

Beyond Black: Scientists Invent the World's Darkest Material - The Takeaway

I doubt my fabric budget would allow it, however.

Saturday, June 28, 2014

Sunny Days

The warm sunny days we were having last week whispered to me that I should be setting up my wet studio in the basement--and so I began to do some experimenting while I was deciding logical places for all the paraphernalia I had brought along from PA. Many of my experiments could not be placed in the successful category and a couple were even in the frustrating category. But I did have some learning breakthroughs, particularly with sun-dyeing. Perhaps the biggest achievement was the reminder to myself that following directions is sometimes worthwhile.  I had been relying on my memory of what I had done before but found my notes on the process and made a couple of discoveries:
1. Don't use opaque Setacolor paint; only the transparent works.
2. Thin paint is best: add water in a 2-to-1 ratio. Thick paint does not produce a darker result; the migration of the paint makes it darker and it needs to be thin to move.

And I actually got some patterning--
I'm not wild about the color, but the images are clear--and that wasn't happening last summer when I tried this.
I am happy with this one, which was the result of some scrunching and some mixing of colors. Now I am ready for a project with grand-kids!

And to round out the week I dyed some shimmery silk for a current project. This just glows when I work with it.


Wednesday, June 25, 2014

A board on which to iron

I had gotten rid of my ironing board before we moved--not because I was giving up ironing (although years ago I did give up ironing clothes except for a particularly wrinkled shirt now and again) but because I had planned a new ironing surface for my studio. And finally last week enough of the must-do items had been taken care of and I could take some time (and some of my husband's time) to create a custom-sized surface.

There are many how-to videos on the web and so I knew the basics. I began with a piece of plywood 48" x 26". I chose plywood rather than some of the other composite wood surfaces because I am hoping the plywood will give off fewer nasty fumes with the steamy heat it will be subjected to, but it also should not warp as easily as wood shelving. The board will sit atop a wooden dresser that holds my commercial fabrics and that is a good height (35" high) for me. I can iron on top of it without hunching over the board and with my forearms parallel with the ground. The board is wider and longer than the top of the dresser, providing more ironing surface, and the dresser backs against my cutting table so excess fabric (or a large quilt top) will be supported in the back.


Next I cut a piece of Quilter's Dream cotton batting (Request weight--one step above the thinnest) just a bit bigger than the top of the board. Quilter's Dream has no plastic scrim that could cause problems if it was heated by a very hot iron.

I made a quick trip to Jo-Ann's for some heavy cotton duck and chose the lightest color they had since I did not want to have any color transfer problems. And I washed and dried it before I used it because that new fabric chemical smell was annoying when I pulled it out of the bag but when heated would have been unbearable.

I cut the duck about 5 inches longer and wider than the board, laid it on the floor, centered the batting on the fabric and then the board on the batting. I folded the fabric around to the back of the board and stapled it in the middle of one side, moved to the opposite side, pulled the fabric as taut as I could and stapled it there, repeating the whole process on the other two sides. The corners were next: I flipped the fabric diagonally over the corner of the board, stapled and then sort of mitered the two sides down and stapled them. I stapled every couple of inches between the corners and the middles and I had a pressing surface!

I can cross one more thing off my to-do list for the studio. And I will not end this blog by saying I now must return to more pressing issues--or perhaps I will. Thanks for the company!


Saturday, June 14, 2014

A Good Day

The morning began cool enough to make me put on a jacket when I set out to walk Terra. I knew the dastardly poison ivy would be at its weakest in such cool temperatures and today I would have to mount my attack, which I had been finding excuses to put off ever since I discovered a tiny patch last week deep within the holly bush that is in great need of pruning in our front yard. So I tied my hair back, put on an old shirt with long sleeves that would be thrown in the wash immediately after my battle, removed my watch (a lesson I learned last summer), donned plastic gloves, and went off to slay the dragon. I came back triumphant--or at least as triumphant as one can be with a plant that can regenerate from the smallest amount of root left in the soil.

And what does this have to do with quilting? Everything. My efforts to eradicate poison ivy from our little yard last summer made me pretty much useless for a week and a half and so pulling poison ivy can radically impact my ability to sit down at the sewing machine or push a needle through fabric.

And I was riding so high from crossing such an unpleasant task off my to-do list that I decided to not only do my usual amount of stitching on my current project but embark on a new one. And so I started pulling fabrics for the first project in my new life in Massachusetts.


Beginnings with all their endless possibilities are energizing. Let's see where this one takes me.

Thursday, June 12, 2014

Begin again

Two weeks ago my new studio looked a bit like what I had been feeling for the past year as we slowly transitioned to a new old home:

But I finally had enough time to set my sewing machine up and some order began to creep into the chaos.

Embracing change sometimes means having to hold on to the neck of a racing horse as he plunges over a ravine and hoping he lands without losing his balance or breaking a leg. (I must have watched too many cowboy movies in my youth.) He hasn't stopped running yet but he made it to the bottom of the ravine without major injury to himself or his rider.

And if you are still reading my on-again, off-again attempts to record my journey, thanks for the company!


Sunday, May 18, 2014

Threads of Color

As I began to pack up my dyeing area in the basement, I realized that I had too much dye left over from my few winter projects and couldn't bring myself just to pour it down the drain. I decided to do a little more experimenting with thread dyeing that I began with the Easter eggs:
I was surprised at how strong the colors were. On the left I tried unbleached perle cotton (bottom) and bleached/mercerized (top) and could tell little difference, although a paler color may show some change, but it would be nice to be able to avoid the bleaching process that adds more nasty stuff to the cotton factory waste water. The upper right one was the result of dipping one end in navy blue and the other in yellow. You may not see much difference in the photo but one end is a nice green and the other dark blue.

I was in a red mood so I mixed up a batch using larger amounts of thread and a bit of a gradation:


Not too much gradation is evident--I was in the using up mode and was a bit profligate with the dye, but got an interesting result with the bottom bit. The others I put in the containers in loose piles but that one I wound into a skein and twisted it, seeing if some parts might be lighter or if I could keep the thread from getting less tangled.  For some reason it turned a much purplier red than the others. Have no reason why. And it did have a couple of small white spots where the dye didn't take.

And finally I still couldn't stand throwing that dye away so I just got out my pfd fabric and had an orgy of dyeing, hoping for very saturated colors. I even threw in the wipe-up rags.

It was still too cold to leave them in the basement to batch so they occupied a corner not already claimed by moving boxes--can't wait for that heated wet studio in Massachusetts.

All the dye is used up and I hope I haven't overstayed my welcome. Thanks for the company!

I'm linking with Off the Wall Fridays.


Monday, May 12, 2014

Gift

In 2011 several members of the local quilt guild got together to form an art quilt challenge group. We had many lively meetings as we revealed our own personal interpretations of the particular challenge we were focusing on. But the last challenge was one I didn't participate in.

At the beginning of May six of us (with one member out of town) met for a potluck lunch, a farewell party of sorts and I anticipated a great meal, since we have some excellent cooks in this group. But even before we sat down to eat, I was presented with an amazing gift--a quilted book with each page designed and made by a different member of the group. I will let the book speak for itself.
Hand-dyed and stitched by Peggi Yacovissi
Kate Means


Nancy Cooledge

Louise Holder

Susan McConnell

Anya Tyson (see her explanation of this page on her blog)


Peggi Yacovissi
Hand-dyed by Louise Holder
Thanks, guys! I will treasure this gift and your friendship--and I will miss you all!

Monday, April 28, 2014

More Onion Adventures

So the fabric sat and stewed with the onion skins overnight and here are the results:


I used purple onions for one and yellow for the other, but if you guess which produced each piece of fabric, you will probably be wrong. The top fabric came out of the pot with the purple onions and the bottom one from the yellow. I was pleased with both colors, but the bottom one has a much stronger personality. The color surprise may be due to the amount of skins used: I didn't have as many purple skins so I will have to try again some time when I have had reason to use a bunch of purple onions and see if the color intensifies at all. 

I am not sure how colorfast these are. I did end up trying very hot water and synthrapol to get them to stop running but never fully succeeded so these are not candidates for any project that involves water. But I felt quite environmentally righteous as I finished up by composting the boiled onions. 

And, if you are still with me, thanks for the company on this natural dyeing adventure!

Friday, April 25, 2014

Multitasking

Easter fell in the middle of a visit from my son and his family (a bittersweet visit since they were saying good-bye to our house and land here in Pennsylvania) and I thought my six-year-old granddaughter might enjoy experimenting with me to see whether onion skins could really dye eggs. I decided to follow the method that involved making a nest of skins around each egg, then bundling fabric around that and tying it with a string--and you may already have guessed the connection between egg-dying and quilting. Continuing my goal of working with some natural dyes this year, I used PFD fabric and began my dying of perle cotton thread with some PFD thread to tie the bundles.

We made four egg bundles--two with purple onion skins and two with yellow, but all were cooked together so I am not sure how the color would change if they were separated. We boiled them for twenty minutes and had a hard time letting them cool since we were so curious about how they would look (I was not setting a very good example of delaying gratification). The results were exciting--nice strong colors and some interesting patterns:
I am assuming the one on the right was in the purple and the other in the yellow but I am not sure since both the skins turned rather reddish.

And here is the fabric and thread:
The color is a bit pale so it was difficult to get a good photo, but the fabric was in the water for only 20 minutes. More is on the way, a larger piece of fabric that boiled and is sitting much longer in the onion skin water:

Stay tuned for the next installment!